Dimensions such as products or branches can be uploaded automatically to Enable via SFTP data feeds to calculate rebate earnings. Dimension items selected in program lines rely on dimension data imported into the Enable channel in order for earnings to be accurately calculated.
Dimensions are located within the Config area of the Trading programs app.
Channel admin users will have access to the Config area and dimension templates within Enable. If you require additional help, please reach out to our support team here.
To download the dimension items template:
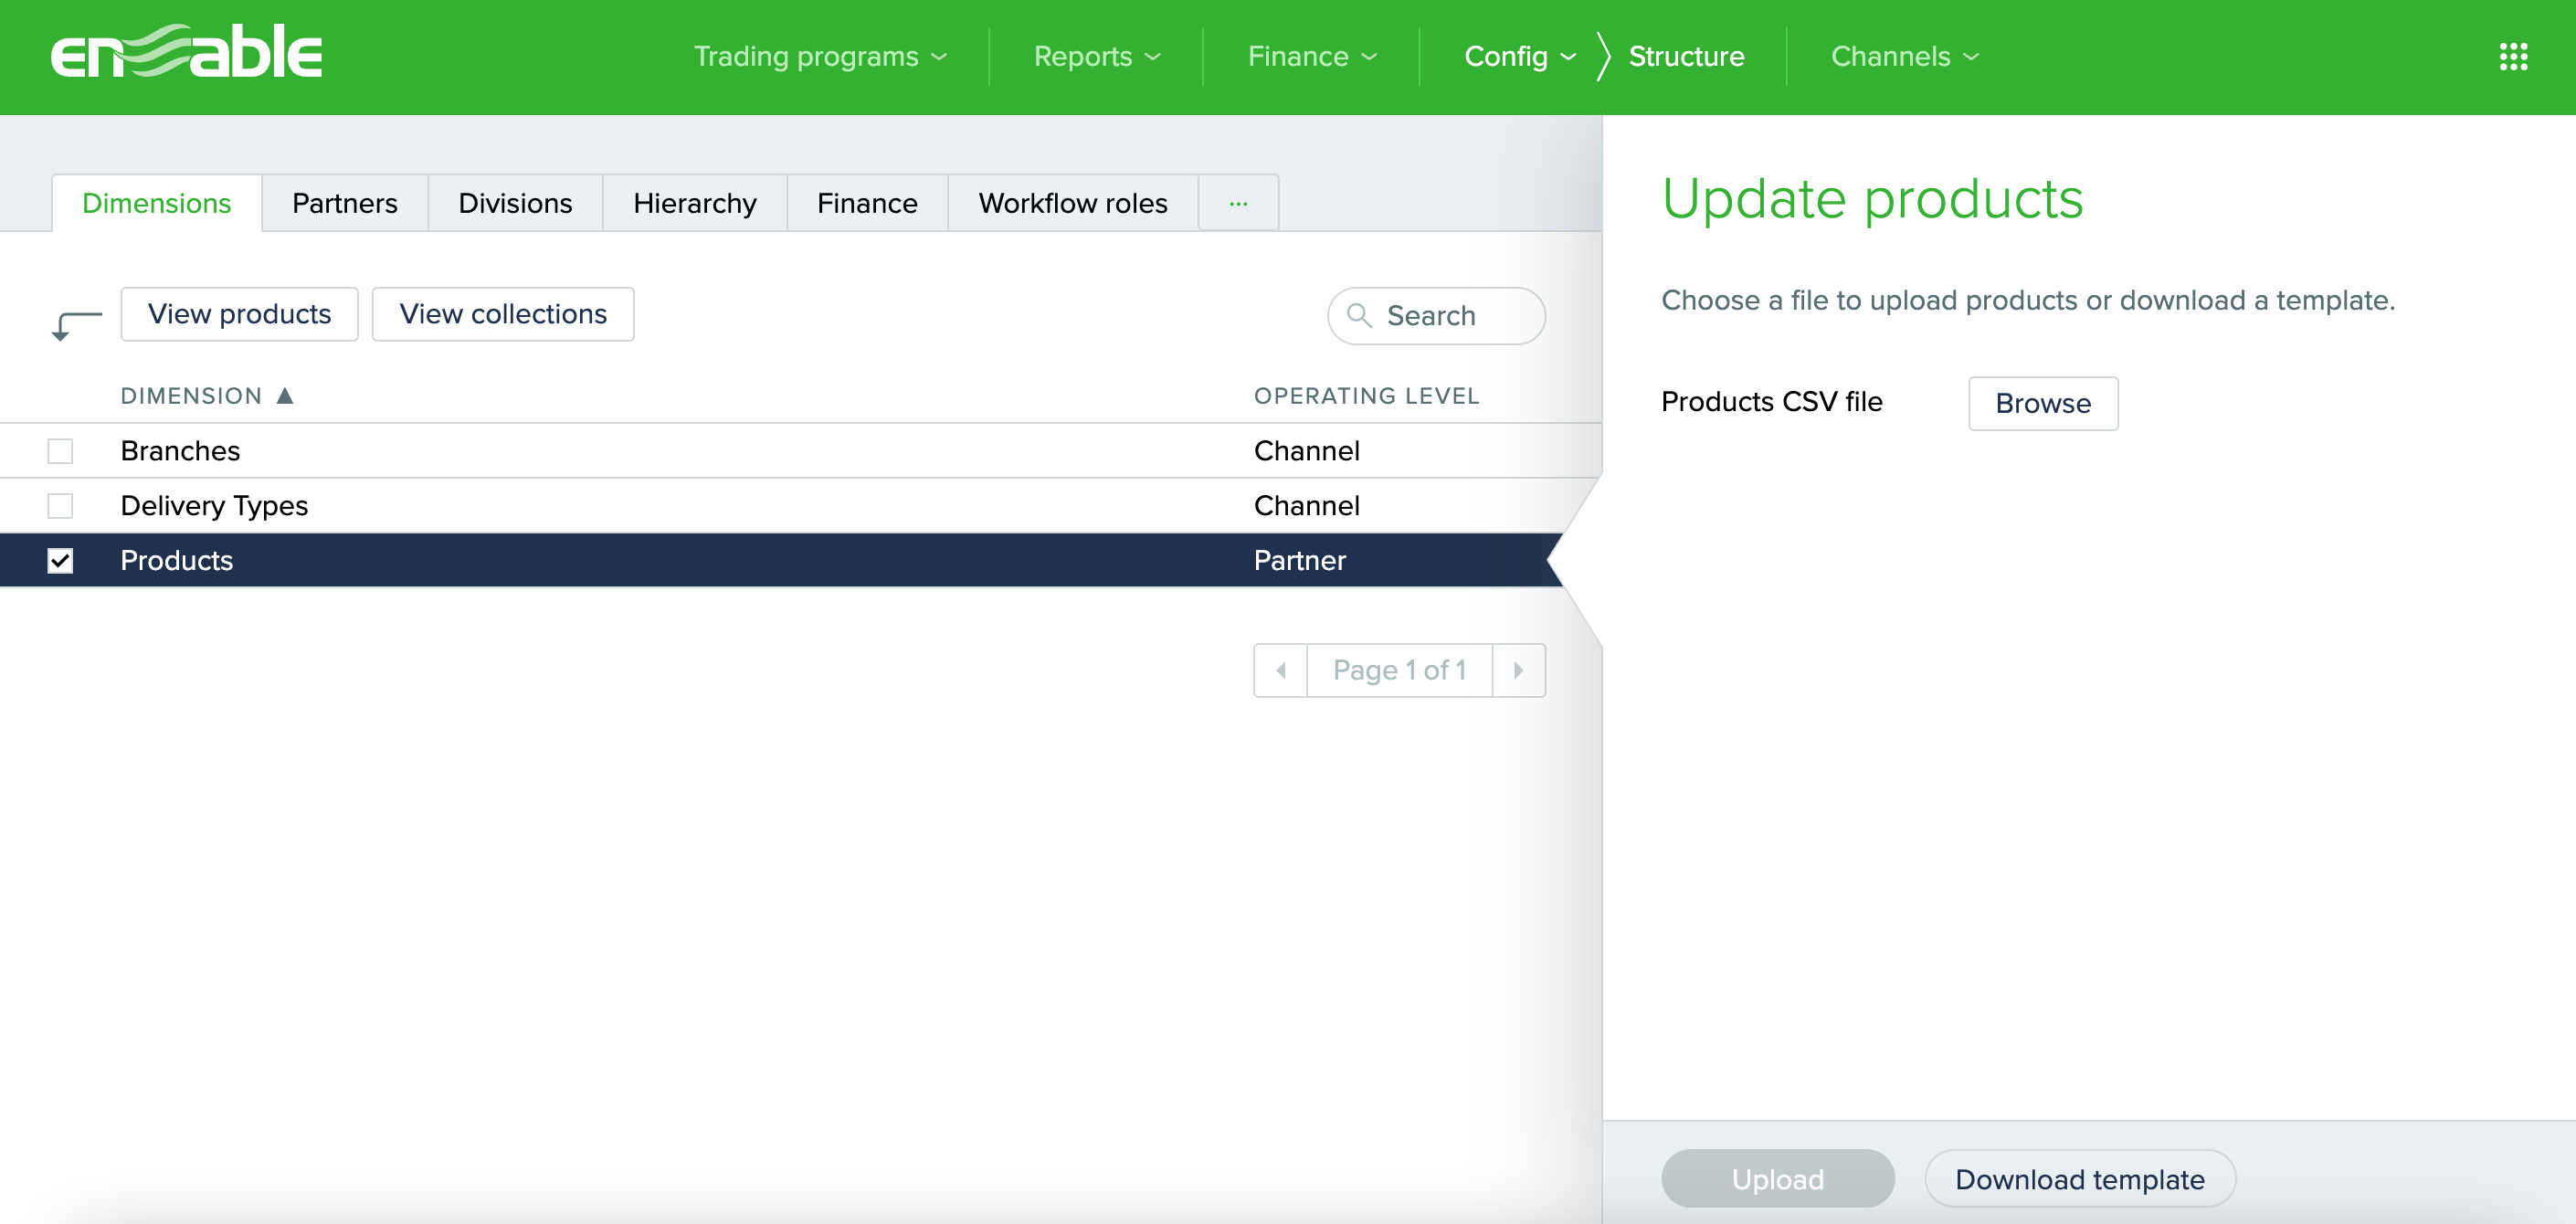
Step 1: Click on Config in the green banner at the top of the page.
Step 2: Click on Structure in the drop-down menu.
Step 3: In the Dimensions tab, click on your specific dimension (e.g. Products).
Step 4: On the right hand side, click Download template and set the checkbox for Populated with existing to download a template containing all existing dimension data within your Enable channel. Alternatively, leave the checkbox not set to download a blank template.
Step 5: Click Download to save the template to your computer’s downloads folder.
Download template for dimensions
If you are importing dimensions via SFTP, you may navigate away from the config area within Enable, and continue with the steps in the next section.
How to populate the dimensions template
Once the dimensions template has been downloaded, you will need to populate each row with the following column data for your dimension items. Column headers must not be changed or renamed in the file.
Dimension Name: This will be changed to your channel’s specific dimension label (e.g. Product Name, Location Name, etc.) Each row will have a name per dimension Item. This field can have a maximum of 255 characters. Each dimension name must only occur once in the column.
Trading Partner Reference: Displayed only if your dimensions are set up at trading partner level. Enter the reference of the trading partner.
Dimension Reference: This will be changed to your channel’s specific dimensions label (e.g. Product Reference, Location Reference, etc.). Each row will have a reference per dimension Item. This field can have a maximum of 100 characters. Each dimension reference must only occur once in the column.
(Optional) Start Date: Determines which dimension Items will be displayed when assigning dimension items to a program line. Dimension items with a start date before the program line start date will not be available for selection. This field, if populated, needs to be in yyyy-MM-dd format.
(Optional) End Date: Determines which dimension items will be displayed when assigning dimension items to a program line. Dimension Items with an end date after a program line end date will not be available for selection. This field, if populated, needs to be in yyyy-MM-dd format.
Dimension Attributes: This will be changed to your channel’s specific dimension attributes. These fields can have a maximum of 800 characters. If not requirement, populate with a hyphen “-”.
Note: Some columns in this template may be labelled differently, or more columns may exist if additional dimension attributes have been set up during your Enable implementation. Please refer to the data guide provided by your implementation team, or reach out to our support team here if you require additional assistance.
If required by your implementation team:
(Optional) Add the row count in the final row in the form “ROWCOUNT IS X”, where X is the total number of dimension items you are uploading. In the CSV file, this will be the total row count - 2. This must all be in uppercase.
How to save the dimensions file
If you have a singular collection for the dimension, save your CSV file and rename the file to the format “{DIMENSION NAME}-TIMESTAMP.csv”, where:
{DIMENSION NAME} is replaced by the pluralized label given to the dimension in your channel, e.g. PRODUCTS.
TIMESTAMP is replaced by a 14-digit number in the form yyyyMMddhhmmss made up of the creation date, e.g. PRODUCTS-20240417030422.csv.
If you have multiple collectionsfor the dimension, save your CSV file and rename the file to the format “{DIMENSION NAME}-{COLLECTION NAME}-TIMESTAMP.csv”, where:
{COLLECTION NAME} is replaced by the name of the dimension collection you want to update, e.g. Products 2024.
{DIMENSION NAME} is replaced by the pluralized label given to the dimension dimension in your channel, e.g. PRODUCTS.
TIMESTAMP is replaced by a 14-digit number in the form yyyyMMddhhmmss made up of the creation date, e.g. PRODUCTS-Products 2024-20240417030422.csv.
Checking the universal requirements for the file
The following criteria must be satisfied for each file imported via the SFTP:
The dataset to be imported must be a CSV file within an encrypted ZIP file.
The name of the ZIP file must be the same as the CSV file.
AES-256 encryption must be used.
The compression method must be either 0x08 (deflate) or 0x00 (store).
The CSV file must use UTF-8 encoding and rows delimited by CRLF.
The CSV file must have:
A first row consisting of correctly named labels for each column/field.
Comma delimited fields in each row.
If commas are used in text fields within the CSV file, double-quote characters should be used for the text fields.
If double-quote characters are used in text fields within the CSV file, these should be represented by two double-quote characters.
How to upload the dimensions file
Step 1: Connect to your SFTP location using the SFTP credentials provided by your implementation team.
Step 2: Navigate to the Imports folder.
Step 3: Upload the Dimension CSV file into the Imports folder.
Step 4: Create an empty file with the same name as the Dimension CSV file with an additional appended “.ok” (e.g. PRODUCTS-20240417030422.csv.ok). This will begin the import process into your channel.
Step 5: Check to see if the file was received by Enable once the file has finished processing. If the Dimension CSV file is in the Succeeded folder, this indicates that the dimension data is now in the Enable platform. If the Dimension CSV file is in the Failed folder, this indicates that the file has failed and a corresponding Error.txt file will be generated describing the error.