In addition to uploading individual payments via Payment allocation, you can also upload multiple payments via Payment uploads. You can access this by clicking Finance at the top of the page, and then Uploads. The Payment uploads tab will then show by default. This page will display the last date on which the payment uploads tab had been used.
By clicking the Next button at the bottom right of the page, you will then have the option to download the import template for bulk payment uploads. You can do this by clicking anywhere on the Download import template button. The template will download to your device, and the instructions page will be displayed. Once you’ve read through them, click Next at the bottom right again and you will be taken to the Upload page.
Please note this example is based on an Enable channel using Supplier as the trading partner label, your template will use the term that has been set for your trading partners. To convert this example to your specific use case please replace any supplier reference with your channel trading partner label. The CSV template consists of a number of columns that need to be populated in order for the upload to work. Please see the below screenshot for reference:
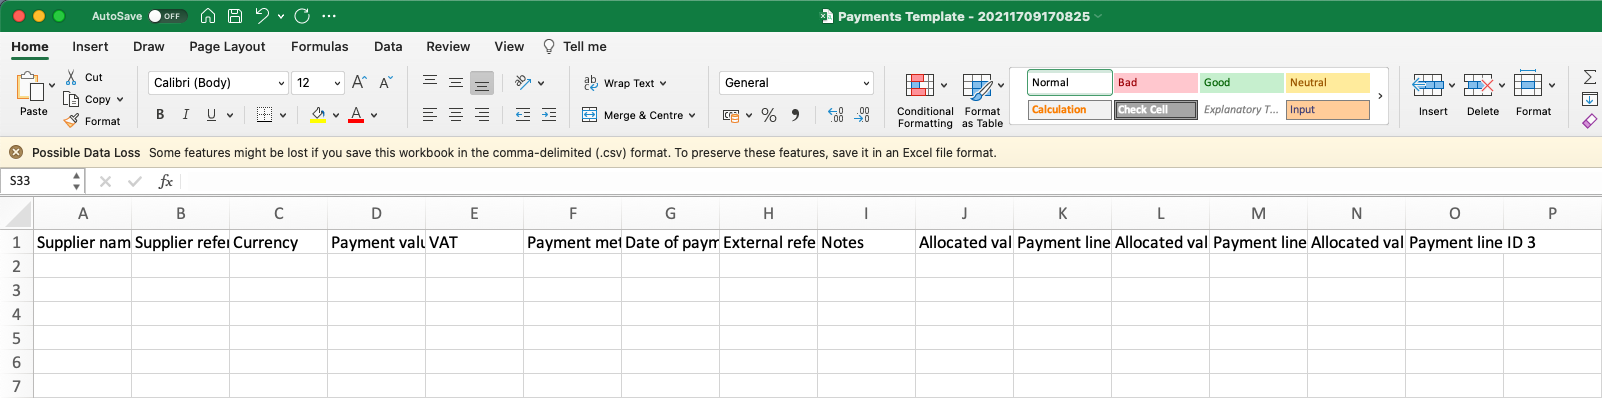
Enter the name of the supplier that you are receiving the payment from. This should match the supplier’s name displayed on the Enable website. Note that if you populate the Supplier name column, you should leave the Supplier reference column blank.
Enter the name of the supplier that you are receiving the payment from. This should match the supplier reference displayed on the Enable website. Note that if you populate the Supplier reference column, you should leave the Supplier name column blank.
Enter the currency used for this payment e.g. GBP, USD, EUR.
Enter the total value of the payment being made.
Enter any tax value that should not be allocated to payment lines. Note that tax value can be used for reporting purposes but makes no actual difference to the payment allocation. Your Finance team will need to make a choice on how and if you use this column.
Enter the payment method for this payment. The list of valid payment methods is displayed on the Instructions page after downloading the template.
Enter the date of the payment in the format YYYY-MM-DD.
Enter a reference for this payment, e.g. an invoice number. Note that all external references will need to be unique for a given supplier.
This is a free text box. Enter any notes as necessary or leave it blank.
Enter a proportion of the total payment value that you would like to allocate to a given payment line. This payment line will be determined by the payment line ID entered in the next column.
Enter the ID of the payment line that you would like to allocate this proportion of the total payment value to. Note that a payment line is different to a program line – one program line can have multiple payment lines allocated to it, dependent on the frequency of payments. You can find payment line IDs on the Debtors report.
Note that there will be 3 pairs of Allocated value and Payment line ID columns by default. You can use as many of these columns as you like to make multiple payment allocations from the same payment. If you have more than 3 payment allocations to make, please add more columns to the template, e.g. Allocated value 4, Payment line ID 4, Allocated value 5, Payment line ID 5, and so on. Note that if you have less than 3 payment allocations to make, you do not need to delete the unused columns – the upload will still work.
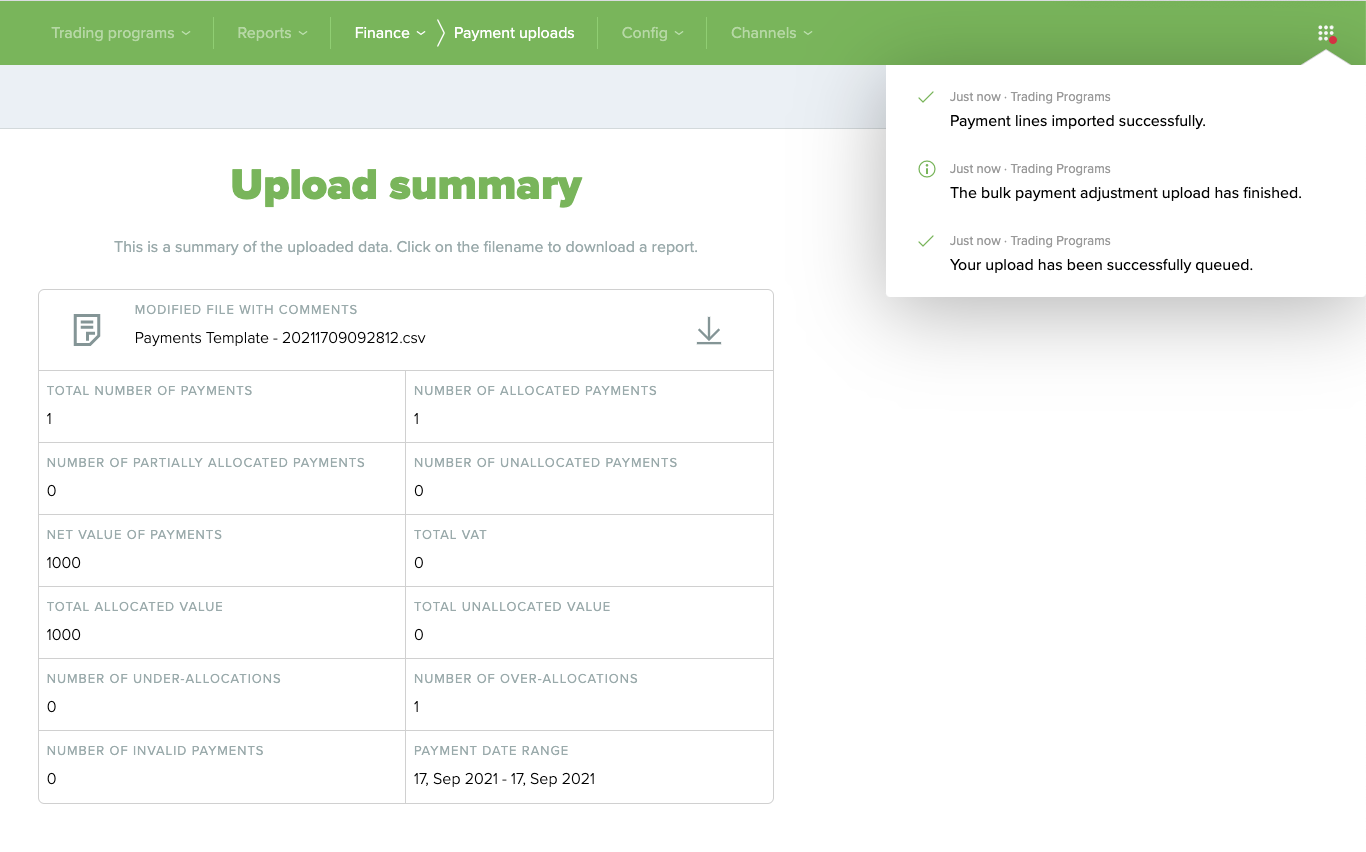
Once you have populated your template, you can then upload your data by clicking anywhere on the Upload button on the Upload page. A window should pop up, allowing you to select your file. Once selected, the file will automatically start to upload, after which you will be presented with an Upload summary page. After a successful upload, the page may look something like this:
After an unsuccessful upload, the page may instead look something like this:
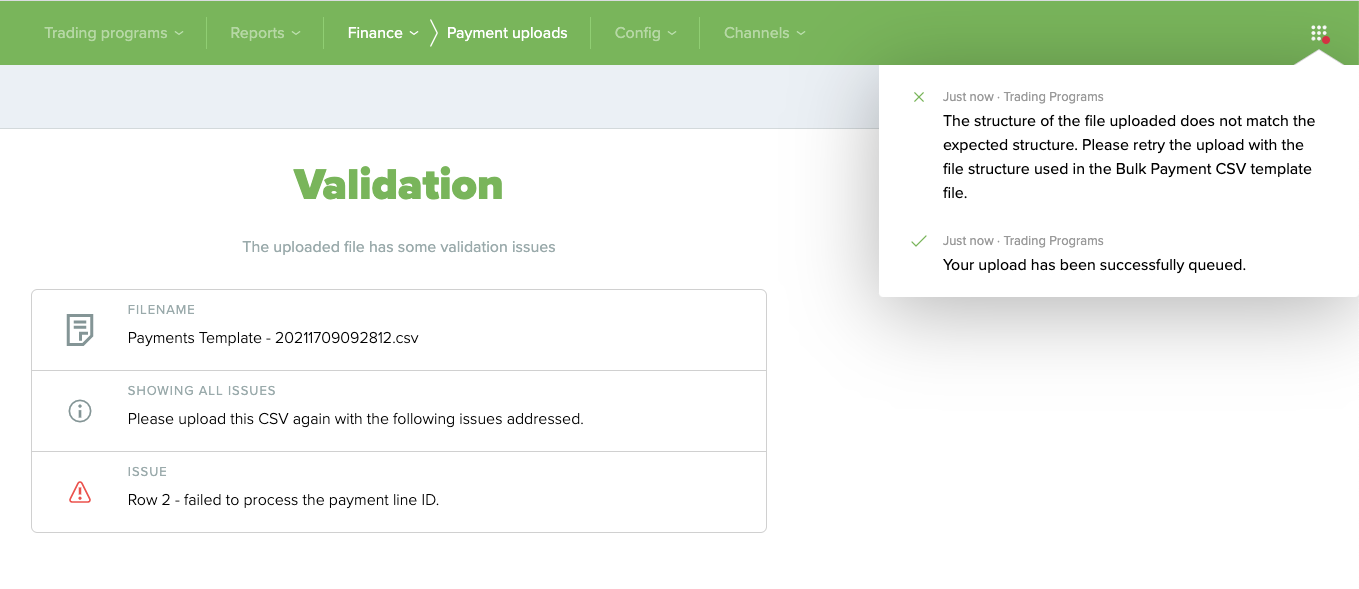
Any issues with the data will be outlined so that they can be addressed before re-uploading the file. Please also refer to this guidance article to ensure the template has been populated correctly.
Once the data has been uploaded successfully, please click Next at the bottom right. You will then be taken to the Upload attachments page, which may look something like this:
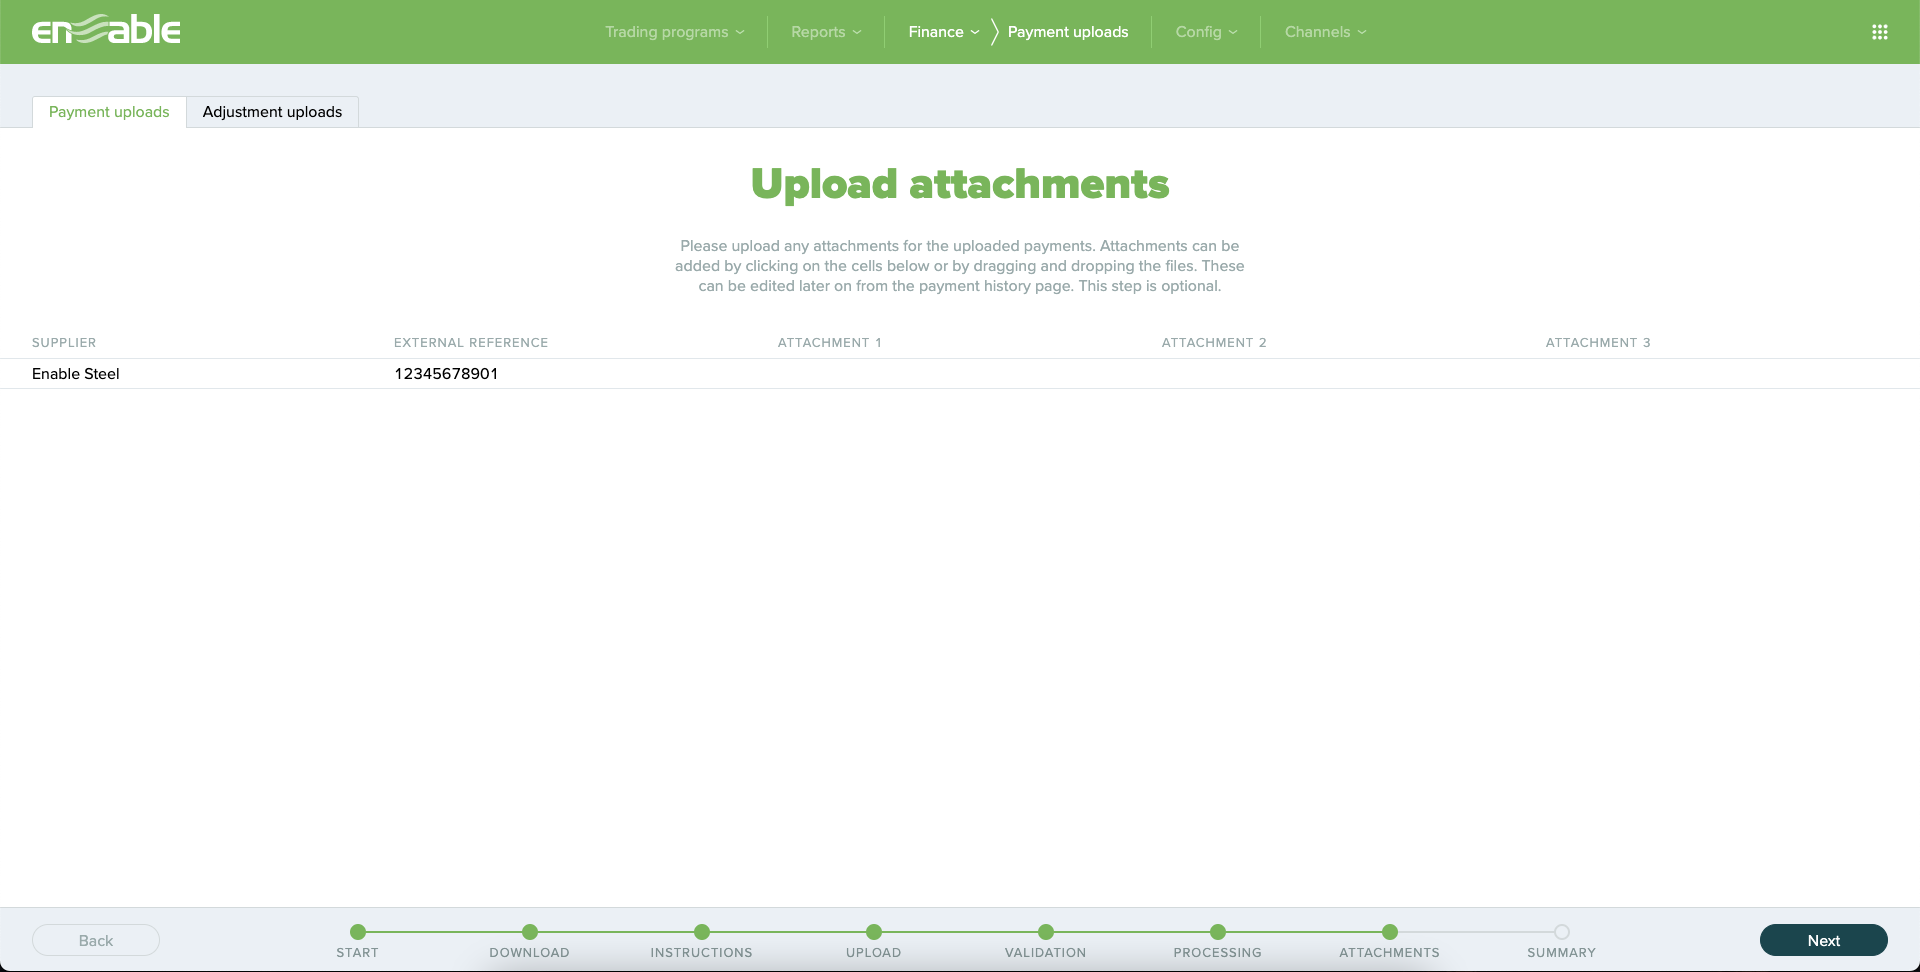
On this page, you can upload up to the three attachments, for example receipts or invoices. These attachments are optional, so this stage can be skipped as necessary. Click Next to move on to the next page, which confirms that your payments have successfully been uploaded:
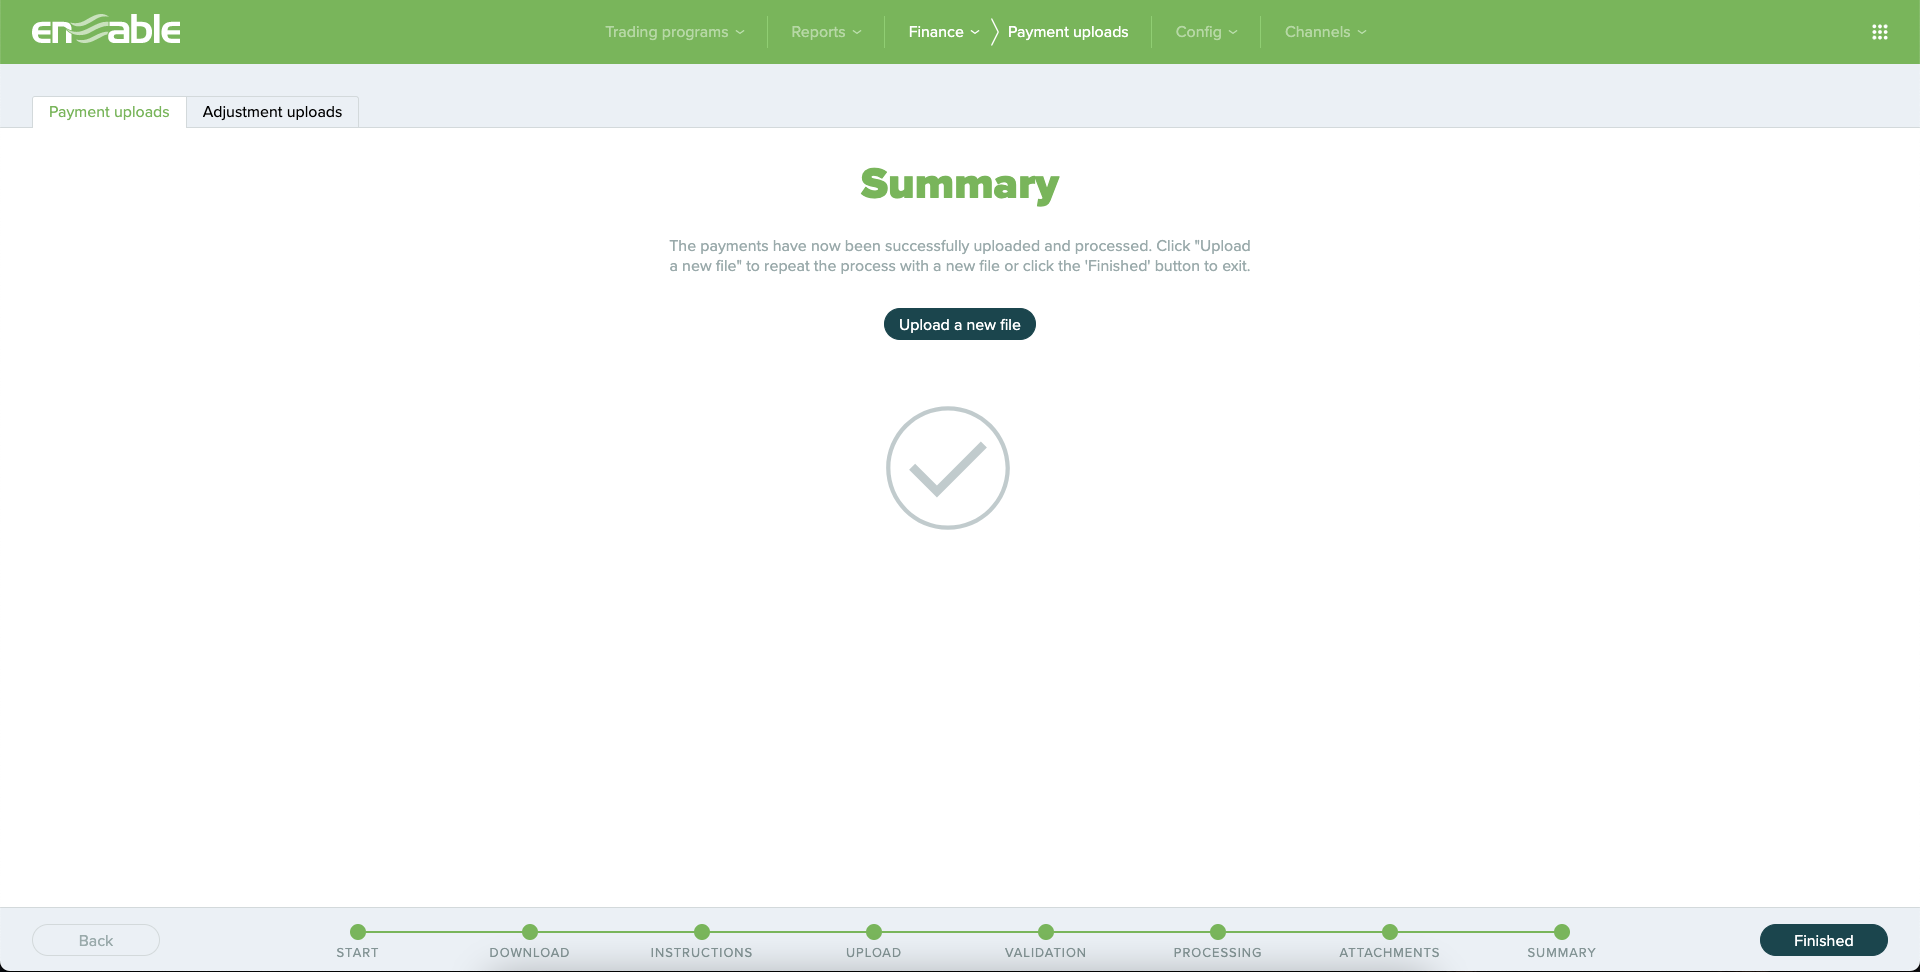
You can continue uploading further data by clicking the Upload a new file button, or you can click the Finished button to be taken to the Payment history page.